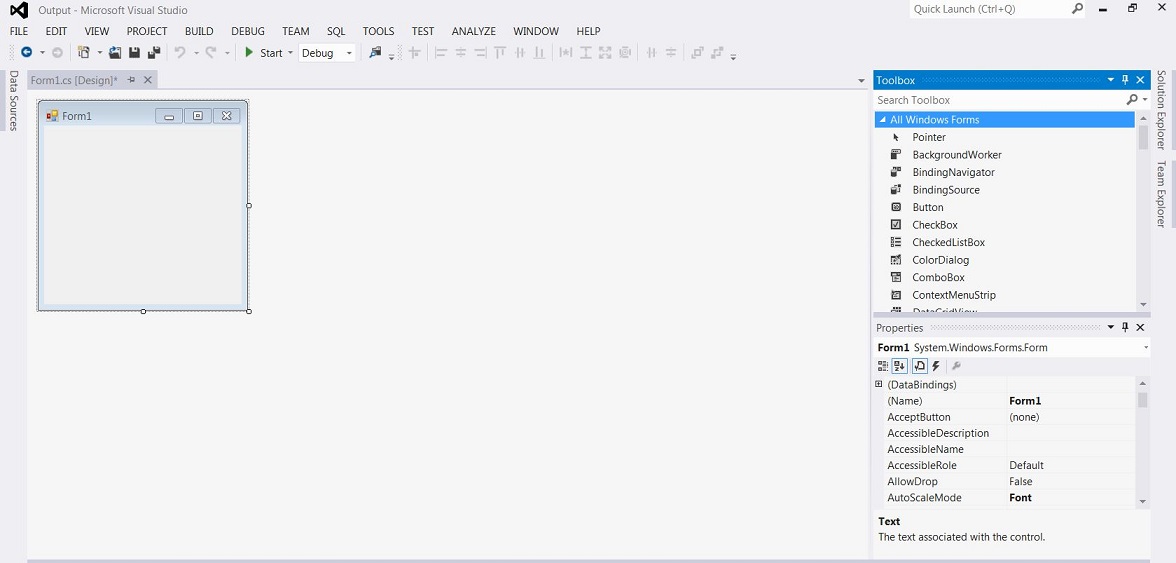
Step 2: With a Windows Form, you need to use the Toolbox utility to add components to your program. Open up the "View" scroll down list at the top of the screen, and select "Toolbox" to open it up. You can then click and drag the Toolbox to position it however you want.
Step 3: In the Toolbox utility, choose the "All Windows Forms" list, and scroll through the options. Add a button, a label, a rich text box and a text box to your form by clicking and dragging them where you want. (P.S. you can resize your form and components by dragging their corners outwards).
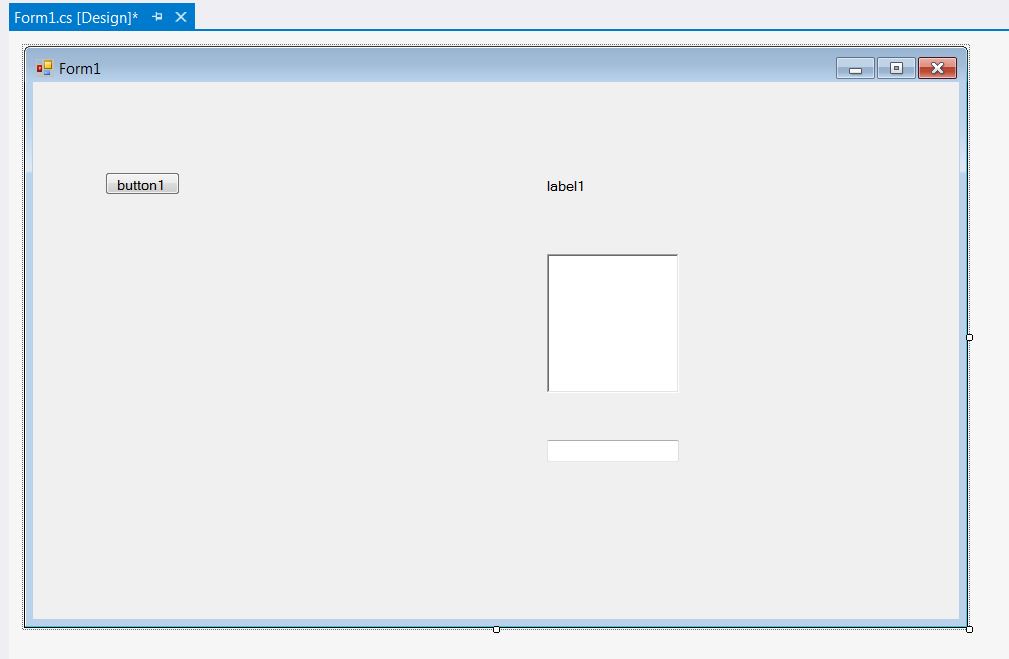
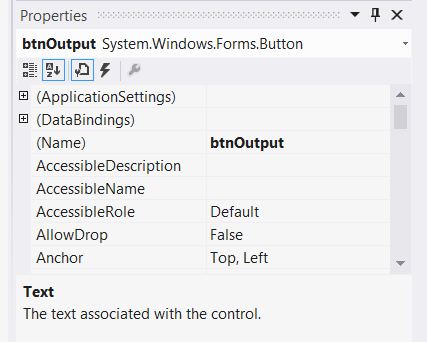
Step 4: You are now going to rename all of your components so they are easier to keep track of. In computer programming, the name of a component will always be a short form for the type of component it is, followed by a description of its function. To rename a component, right click on it and select "Properties." The "Name" field will be near the top of the list that pops up. Rename your button to "btnOutput," your label to "lblOutput," your textbox to "txtOutput," and your rich text box to "rtbOutput." I encourage you to come back to the Properties tool another time, and try changing other aspects of your components.
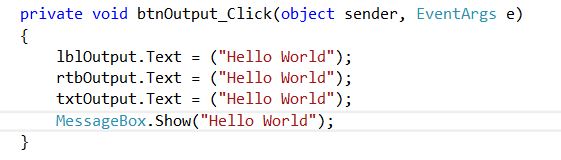
Step 5: Now it's time to start editting some code. To access the code, just double click on a component on your form. Then, to switch back and forth between your form designer page and your code, you can click the little tabs that show up above your work (Form1.cs* and Form1.cs[Design]*). Double click on your button to add it to the code. You should end up with a part of your code now that looks like this:

Step 6: This part of your code is the part that deals with what happens when your button is clicked (that's why it says btnOutput_Click at the top). Here is where we are going to put in our code for giving output to our label, textbox, rich text box and a pop up message box as well. Copy the following code into your program:
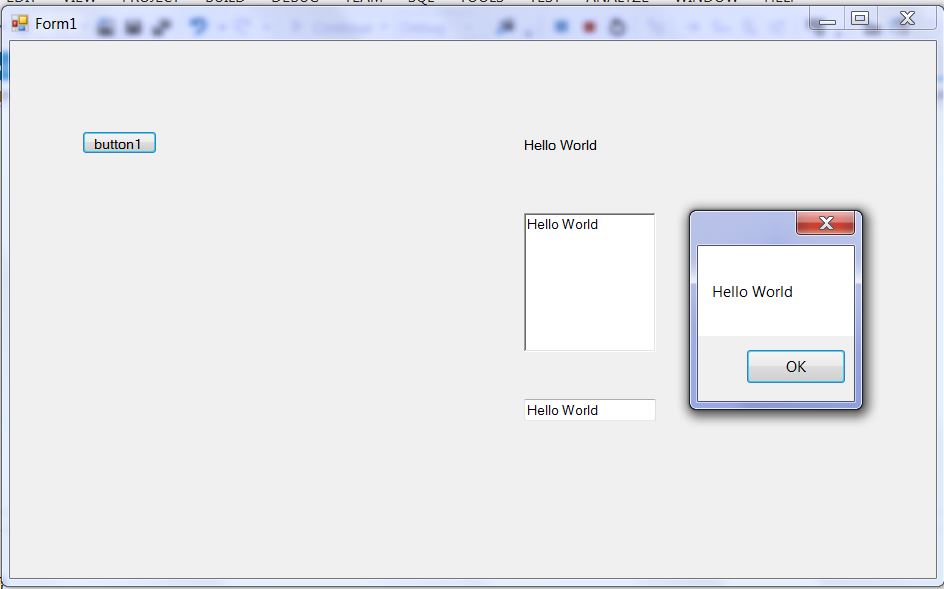
Step 7: And now the fun part! Run your program and try clicking the button. If you did it all right, this should be what you get:
Awesome Additional Info: There tons of ways you can create output that are more complex and creative than the ways that I showed here. If you want to seperate your text onto two lines, simply add the \n escape sequence, and that will tell the program to create a new line. Another common escape sequence would be \t, which adds a tab to text in a rich text box.
One type of output that is very useful in all kinds of programs would be pictures. Adding a picture to your windows form is a bit more involved than simply adding text. Here are some instructions.
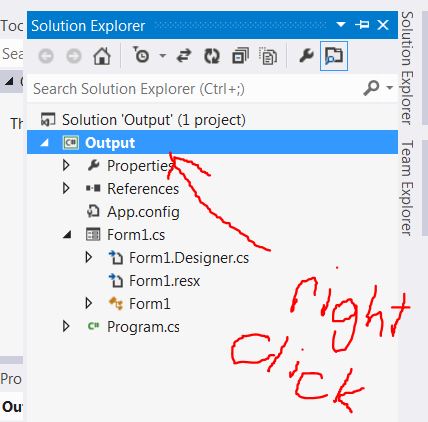
Step 1: In your solution explorer (you can open that the same way you did the toolbox), right click on the top line that says c# Output, and choose "Add" and the "Existing Item" on the scroll down list. Choose the file you want to add from the browser that pops up (make sure that it is set to view Image Files).
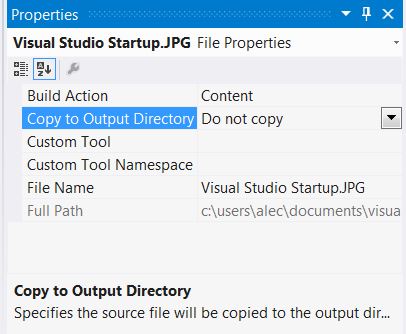
Step 2: Your picture will show up in your solution explorer now, and you can edit its properties just like anything else. Change the property that says "Do Not Copy" to "Copy Always."
Step 3: Add a picture box to your form, set its SizeMode property to "Zoom" and its name to "picOutput."
Step 4: Type the following code in under the btnOuput_Click where you stuck the rest of your code:
Bitmap b = new Bitmap("imagefilename.jpg");
picOutput.Image = (Image)b;
Step 5: Run your program, click your button and see your picture.